How to Use Google Keyword Planner: A Step-by-Step Guide
Introduction
If you’re looking to drive more traffic to your website, Google Keyword Planner is one of the best free tools to help you find the right keywords. Whether you’re running an SEO campaign or planning a PPC strategy, mastering this tool can give you an edge.
In this guide, we’ll break down how to use Google Keyword Planner effectively, step by step.
Step 1: Access Google Keyword Planner
Before you can start using the tool, you need access to it. Here’s how:
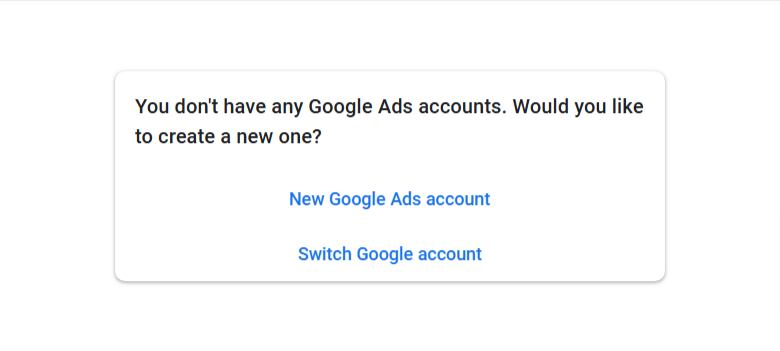
- Create a Google Ads Account: If you don’t already have one, sign up for a Google Ads account. You’ll need to input some basic details like your email address and billing information, but don’t worry—you can use the Keyword Planner without running an ad campaign.
- Log In: Once your account is set up, log in to Google Ads.
- Navigate to Tools: In the left menu, find the “Tools” option and click on it.
- Select Keyword Planner: Under the “Planning” section, you’ll see “Keyword Planner.” Click on it to open the tool.
Step 2: Choose Your Objective
Google Keyword Planner offers two main tools:
- By Keywords: Enter one or more keywords related to your business or content topic. For example, “Digital Marketing Company in Bangalore”
- By Website:Enter your website URL (or a competitor’s) to find keywords relevant to the content on the site.
After entering your input, click “Get Results.”
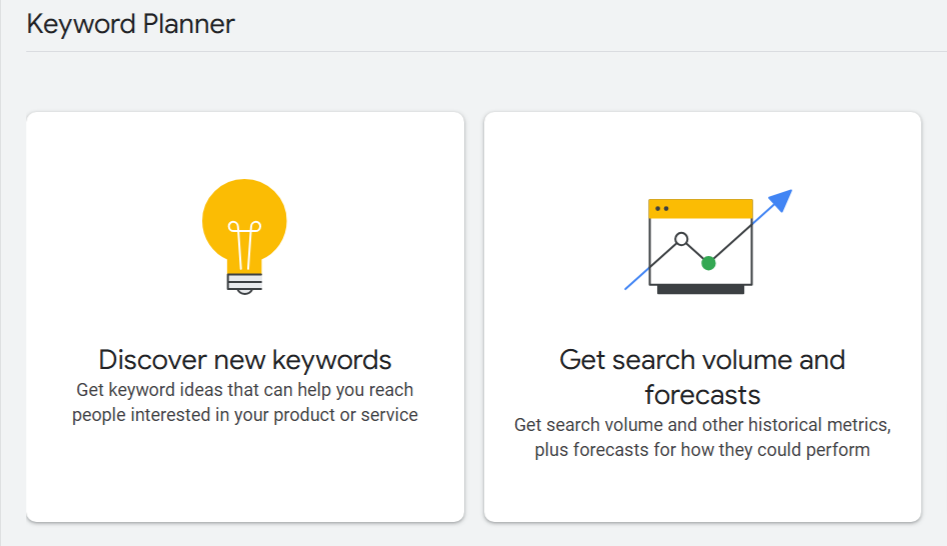
Step 3: Discover New Keywords
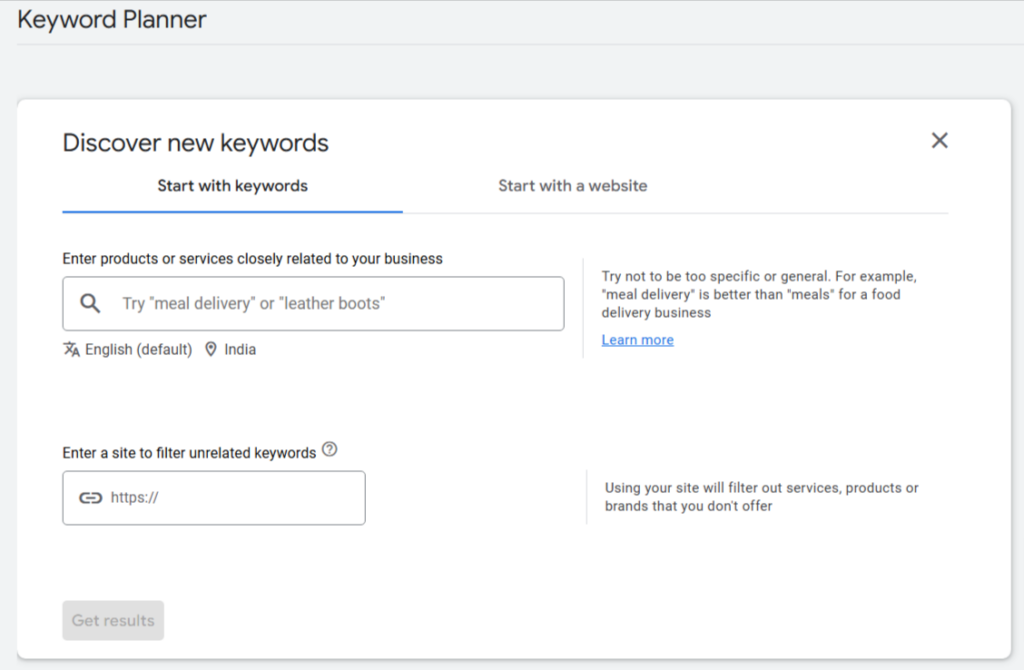
If you select “Discover New Keywords,” you’ll have two ways to search:
- By Keywords: Enter one or more keywords related to your business or content topic. For example, “Digital Marketing Company in Bangalore”
- By Website: Enter your website URL (or a competitor’s) to find keywords relevant to the content on the site.
Step 4: Use Filters to Refine Your Search
Google Keyword Planner allows you to filter results for better targeting. Here are some key filters:
- Location: Specify the geographic region you want to target. For example, choose “United States” or “India” if your audience is country-specific.
- Language: Select the language your target audience uses.
- Search Networks: Decide if you want data from Google’s search network or include partner sites.
- Keyword Text: Filter by specific words or phrases to narrow down your list.

Step 5: Analyze the Results
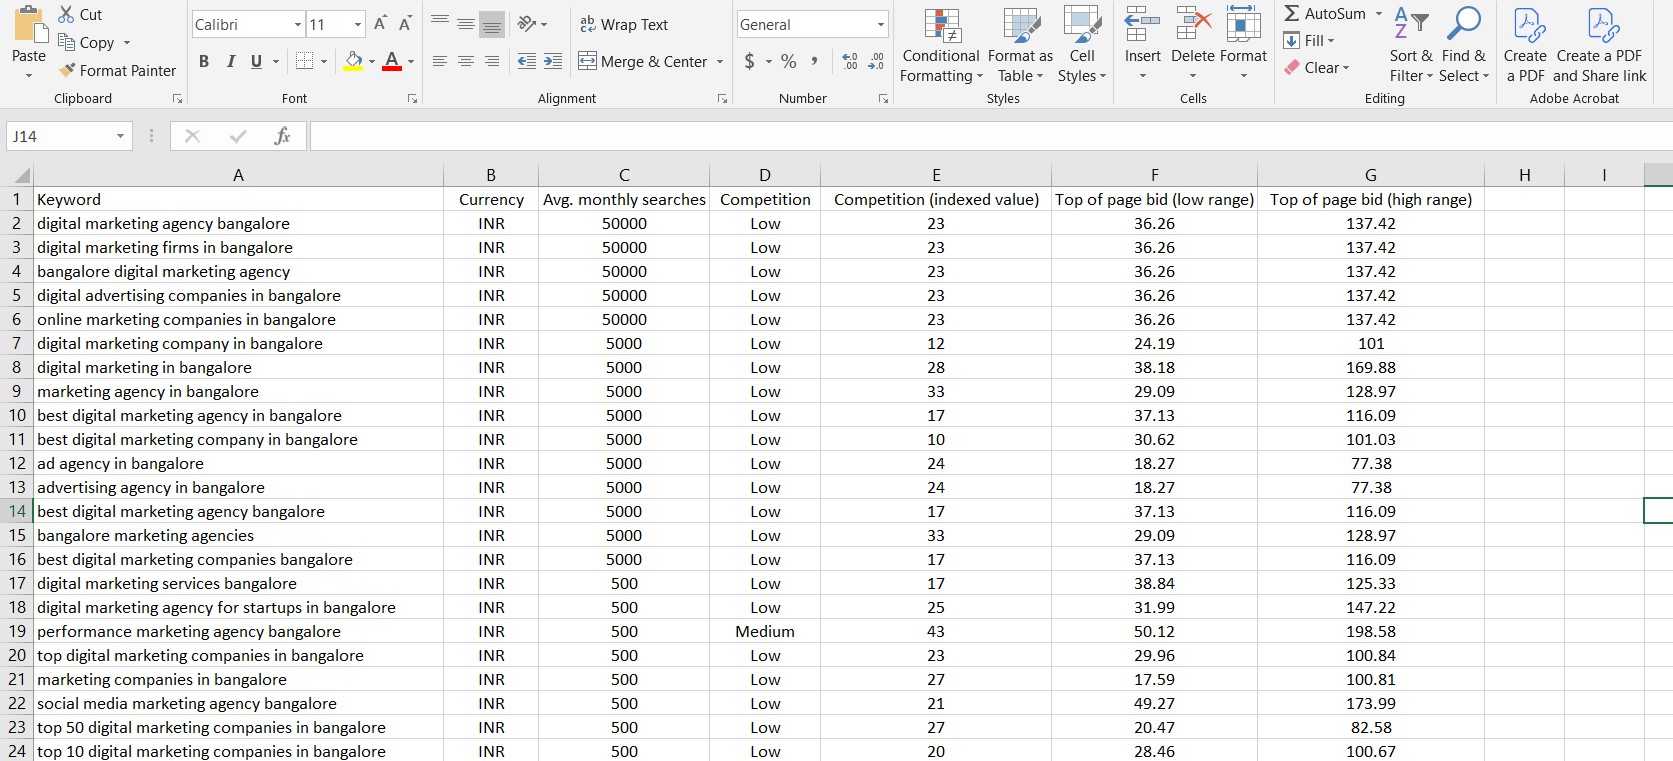
Once you generate results, you’ll see a list of keyword suggestions along with important metrics:
- Average Monthly Searches: This shows how often people search for the keyword each month.
- Competition: Indicates how competitive the keyword is for advertisers (low, medium, or high).
- Top of Page Bid (Low/High): Gives an estimate of the cost per click for advertisers.
Sort and filter the results to find the keywords that best align with your strategy. For instance, if you’re focusing on organic traffic, prioritize keywords with high search volume and low competition.
Step 6: Get Search Volume and Forecasts
If you already have a list of keywords, use the “Get Search Volume and Forecasts” option. Here’s how:
- Paste Your Keywords: Enter or paste your list of keywords into the input box.
- Review Metrics: You’ll see projected impressions, clicks, and costs based on your input.
- Adjust Filters: Like with the “Discover New Keywords” option, you can adjust filters for location, language, and network.
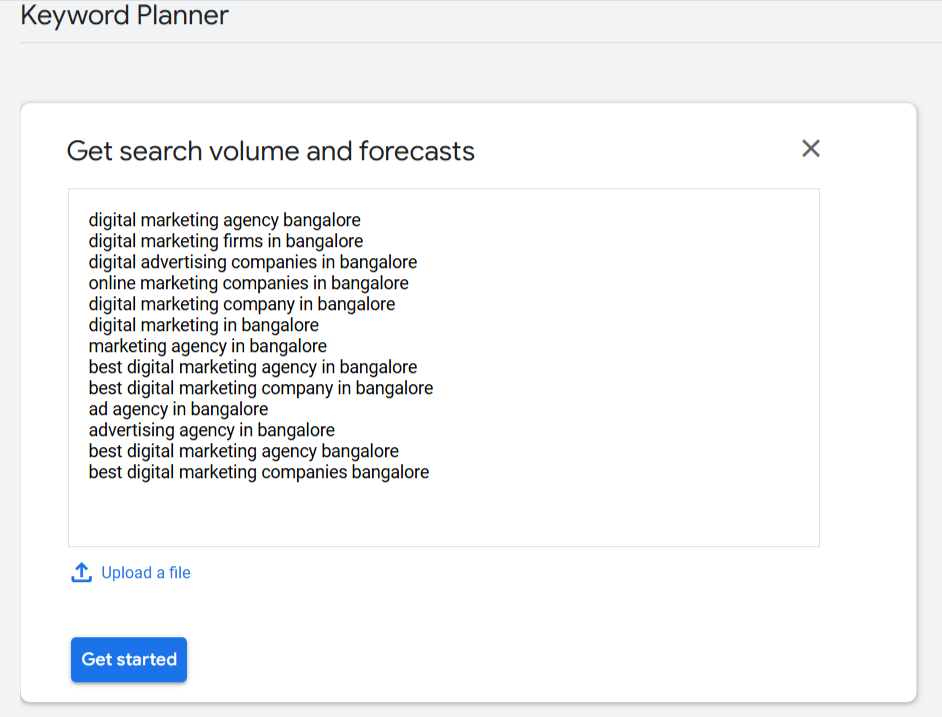
This feature is especially useful for PPC campaigns as it provides actionable insights into potential performance.
Step 7: Save and Export Your Keyword List
Once you’ve curated a list of relevant keywords, save your work:
- Download: Click the download icon to export your keywords in CSV format.
- Organize: Use a tool like Excel or Google Sheets to organize and analyze your keywords further.
This ensures you have a ready reference for implementing your SEO or PPC strategy.
Step 8: Implement Your Keywords
Now that you have your keyword list, it’s time to put them to use:
- For SEO: Optimize your website’s content, meta tags, and headers using the selected keywords.
- For PPC: Use the keywords to create targeted Google Ads campaigns with relevant ad groups and landing pages.
Pro Tips for Using Google Keyword Planner Effectively
- Combine with Other Tools: Use Google Keyword Planner alongside tools like SEMrush, Ahrefs, or Ubersuggest for a more comprehensive keyword strategy.
- Focus on Long-Tail Keywords: Long-tail keywords often have lower competition and higher conversion potential.
- Monitor Trends: Regularly revisit the tool to discover new trends and adapt your strategy.
- Experiment: Test different keyword combinations and analyze which perform best.
Conclusion
Google Keyword Planner is an invaluable resource for marketers, whether you’re optimizing for SEO services or running PPC campaigns. By following these steps, you can identify high-value keywords, refine your strategy, and achieve better results. Start exploring today and unlock the potential of your digital marketing efforts!
Frequently Asked Questions
Low Range: The lowest bid amount for top positions.
High Range: The highest bid amount for top positions.
It helps gauge keyword competitiveness and potential ROI in PPC campaigns.
Low competition keywords are easier to rank for but may have lower search volumes.
Combine competition data with search volume and CPC (Cost Per Click) to find profitable yet achievable keywords for your campaign.


